Genius $4 hack to make Christmas wrapping easy
It’s that time of the year again, and last-minute Christmas shopping - followed shortly afterwards by wrapping - has made its way to the top of everyone’s ‘to do’ list.
But whether you’re a gifting pro or a novice in need of a tip or two, there’s one $4 product that’ll make life a lot easier.
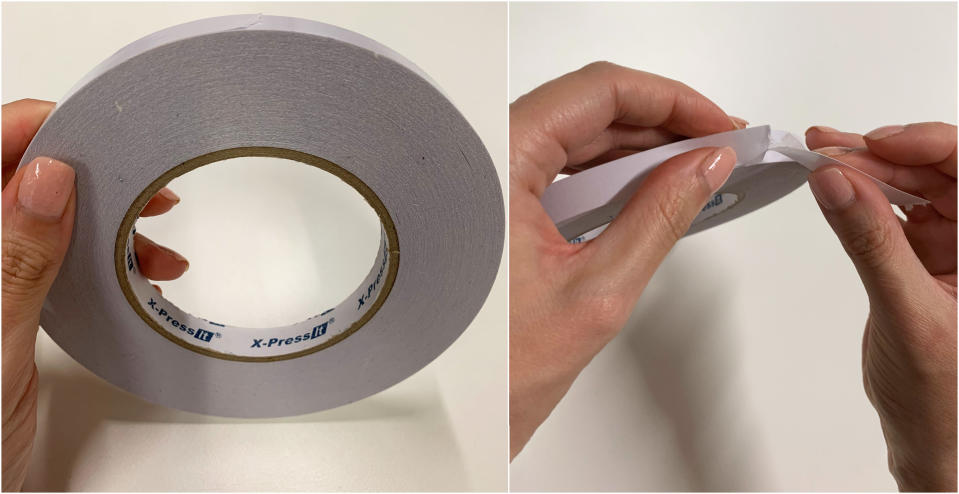
I stumbled across the ‘X-Press It’ double-sided tape at a present wrapping master class and couldn’t keep the hack to myself.

If you aren’t familiar with the joys of double-sided tape, it makes the final look of your present just that little bit more presentable, as you can hide the tape under the fold - but the best part about this particular roll is that you don’t need scissors to use it.
It’s tear friendly, so you just pull it out to the length that you want, and rip it off. No scissors necessary and no annoying tape holder to wrestle with. Watch it in action below, and forgive my fumbling on the removal of the top layer, I’m a hopeless gift-wrapper.
Luckily for the unskilled amongst us, you can pick up 6 metres of this bad boy for just $4 at Officeworks - and no, this isn’t a paid ad for them.
More wrapping tips:
Unfortunately, a little double-sided tape won’t get you very far if you aren’t nailing the basic principles of gift wrapping in the first place, so here are a couple of other expert tips to help wrangle that pile of Christmas prezzies.
Cut to the correct size
One of the biggest wrapping mistakes people make, or so I’m informed, is that we use too much paper that then gets in the way and creates bulky folds.
So spend the time making sure you’re using just enough wrapping to completely cover your gift, and not metres more.

Forget the corners
Clean and precise folds are the key to getting corners done right, but if no matter how hard you try, they never work out - just forget them.
As master gift-wrapper, Megumi Inouye, demonstrates in the video below, you can create a really unique look by just covering the larger sides of your gift and leaving the ends exposed.
Use ribbon with boning
If you like to finish your gifts with a little something special, try a ribbon with boning along the edges as this helps it to stand up nice and straight after you’ve tied a bow.
For help creating the perfect bow, take a look at the video below which I filmed at the aforementioned Officeworks masterclass.
Got a story tip or just want to get in touch? Email us at lifestyle.tips@verizonmedia.com
Want more lifestyle and celebrity news? Follow Yahoo Lifestyle on Facebook, Twitter and Instagram.

 Yahoo Lifestyle


